Have you ever wondered how mold removal works in your kitchen? Do you need kitchen mold removal in NJ? The kitchen in your home is an important place. It’s where you prepare your meals and eat the food that you ingest into your body. It is also a place that offers an ideal environment for mold to grow.
There are several reasons why you may need kitchen mold removal in NJ. The primary reason you may need mold remediation services are moisture on porous building materials. Unfortunately, your kitchen is a place where both exist. When untreated mold begins growing in your kitchen it can quickly spread, causing an unhealthy living environment which can be very costly to fix. It is important to remove it as soon as you see it growing and equally important that you learn how and why it grows in your kitchen. When left untreated, mold can easily take over your kitchen causing an unhealthy living environment and the need for costly kitchen mold remediation services. So let’s look into some the most common reasons why mold growth will occur in your kitchen.
- PLUMBING LEAKS:
Often, you can have a hidden plumbing leak that will cause your kitchen cabinets, walls, and other building materials to get wet. This will create the perfect environment for mold problems to develop and grow in your kitchen. These plumbing leaks can come from several different sources in your kitchen. You may have a leaky drain line under the kitchen sink, leaking water supply lines, a cracked refrigerator water supply line, or a dish washer machine leak.
There are many reasons why these leaks occur such as improper installation, broken or worn-out gaskets, as well as degrading over time. It is important to act quickly when you discover a plumbing leak in your kitchen. First you need to hire a licensed plumber to correctly fix the leak. Then you must thoroughly dry down all wet surfaces. This must all be done within 48 hours of the leak occurring to prevent any mold growth from occurring. Therefore, it is necessary to inspect your kitchen on a regular basis, looking for any potential plumbing leaks. By doing this, you will be able to quickly identify any moisture problems in its early stages before it gets out of hand. This will help you avoid the high cost associated with kitchen mold removal services in your NJ home.
- HIGH HUMIDITY LEVELS
Mold will thrive in an environment with high humidity levels for a prolonged time. When this happens in your kitchen you will likely experience mold growth on damp porous surfaces. Therefore, you need to maintain humidity levels under 50% in your home or office. The EPA recommends that relative humidity levels inside of a building structure should be kept between 30 and 50% to maintain a healthy indoor environment. Simply having a hygrometer mounted on your kitchen wall to check humidity levels in your kitchen can save you thousands on a costly kitchen mold testing and mold removal project. These decorative hygrometers can easily be purchased at Home Depot, Lowes, or online. These hygrometers are simple and easy to use.
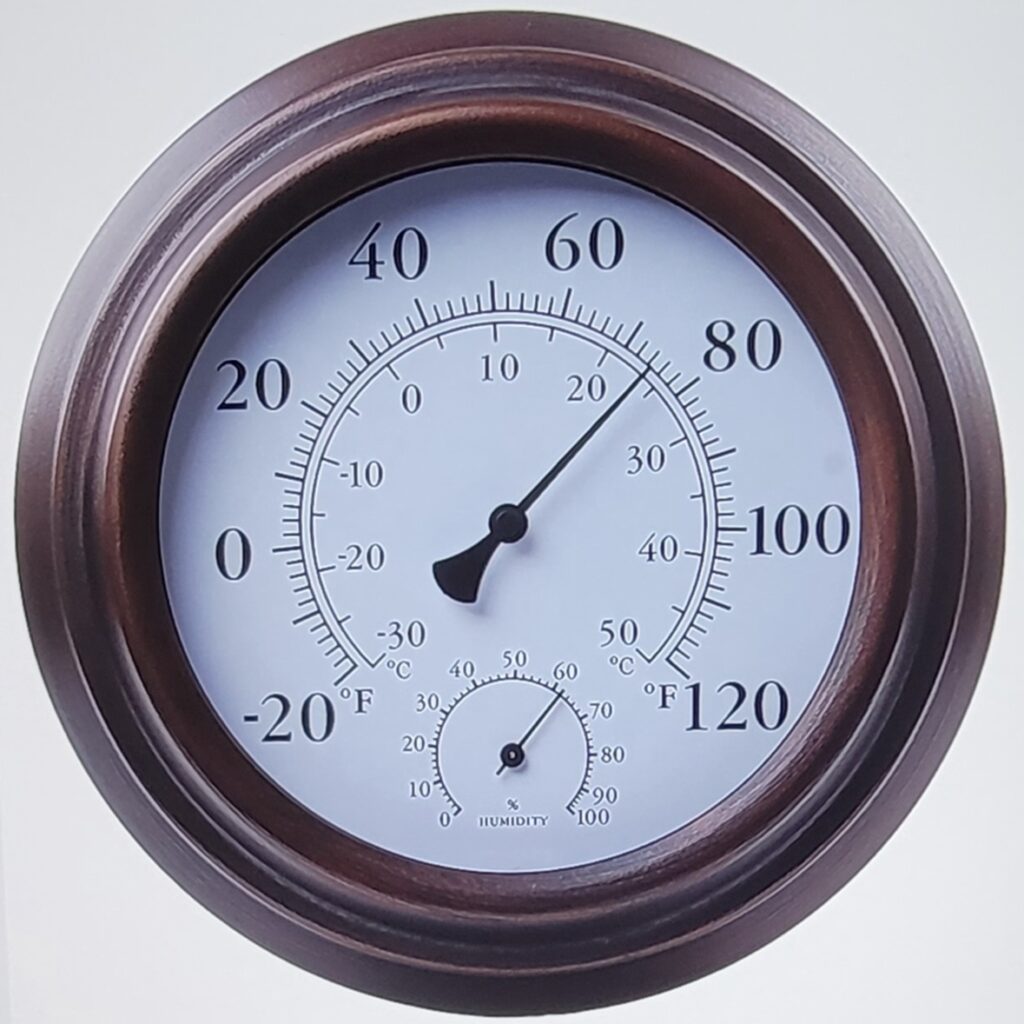
It is important to remember that moisture is generated every time you cook or use your dishwasher. When wall or cabinet surfaces are damp because of high humidity, mold problems can begin developing rapidly. Therefore, to prevent the need for mold testing and kitchen mold removal services in your NJ kitchen, you should always run your exhaust fan over the stove to push this humidity out of your home.
Also be sure to occasionally check that your exhaust hood vent is working properly, pumping the hot humid air from cooking to the outside of your home. Keep pots covered while cooking, except for when you need to check on your food as it is cooking. By keeping your pots covered during the cooking process you will reduce the amount of moisture going into the air in your home, which in turn will reduce the likelihood of mold remediation services. Also make it part of your regular routine to check your dishwashing machine for seal and gasket leaks.
3. GARBAGE DISPOSAL:
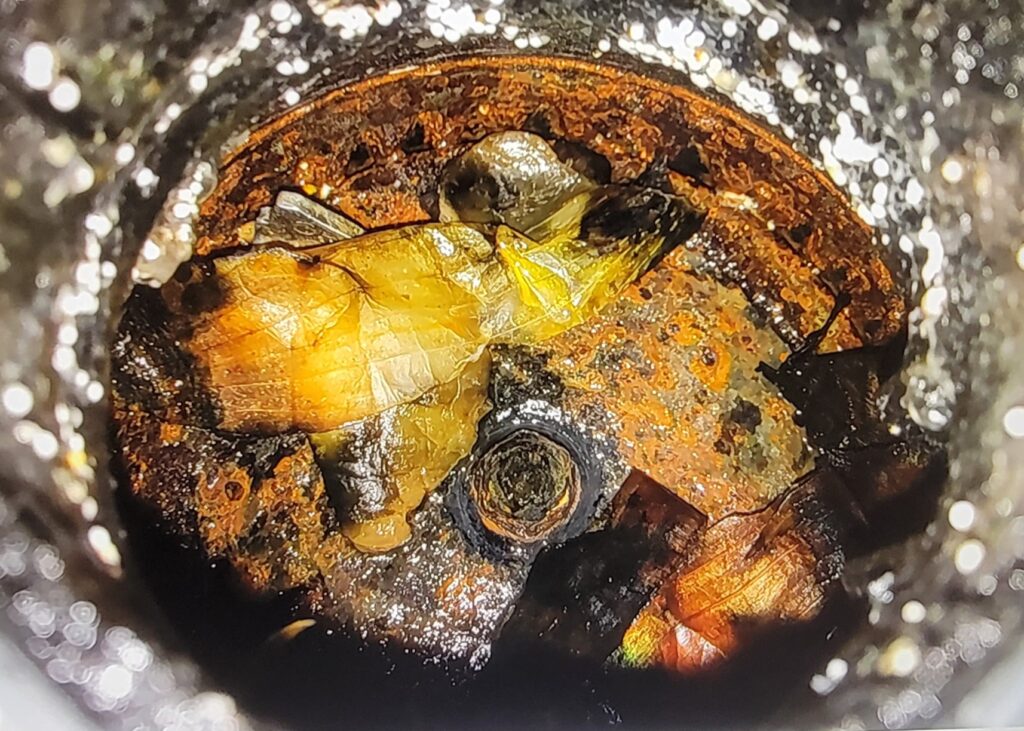
If you have a garbage disposal it can be an ideal breeding ground for mold in your kitchen. If you do not keep your garbage disposal system clean, it can quickly and easily begin growing in the system. Decomposing food, grease buildup, and constant moisture will cause your garbage disposal to become an excellent breeding ground. Additionally, a common cause for garbage disposal mold remediation is the plastic tubing to the system leaking. This will cause water to become trapped under the base of the cabinet causing hidden mold growth under your kitchen cabinets. To prevent this from happening, we recommend that you clean your garbage disposal system on a regular basis with vinegar which will help prevent the need for kitchen mold removal services mold inspection and mold testing company services in your NJ home.
Mold Growing inside Your Kitchen Cabinets Can Become Expensive
Imagine opening one of your kitchen cabinets and getting a strong odor in your face. That strong musty smell are mycotoxins. Mycotoxins are the spores that mold puts off protecting itself. It is also what makes people sick. So, what should you do when this happens? Should you just continue cooking your meal? Or should you start looking for the source of this terrible odor? Turns out that I had a similar problem that ended up being a huge mold problem. This was in my mother’s house.
One evening while visiting my mom, I decided to help out with cooking dinner. Then when I opened the cabinet underneath her kitchen sink to find the dish washing soap, an all too familiar smell was present. The easily recognizable earthy / musty smell of mycotoxins hit me in the face! The smell was so potent that my eyes began to water, and my throat tightened up. I had to quickly close the cabinet and walk out of the kitchen. The moral of the story was that my mother had a huge mold problem on her hands. Luckily her son was in the NJ kitchen mold removal business! You on the other hand may not be so lucky.
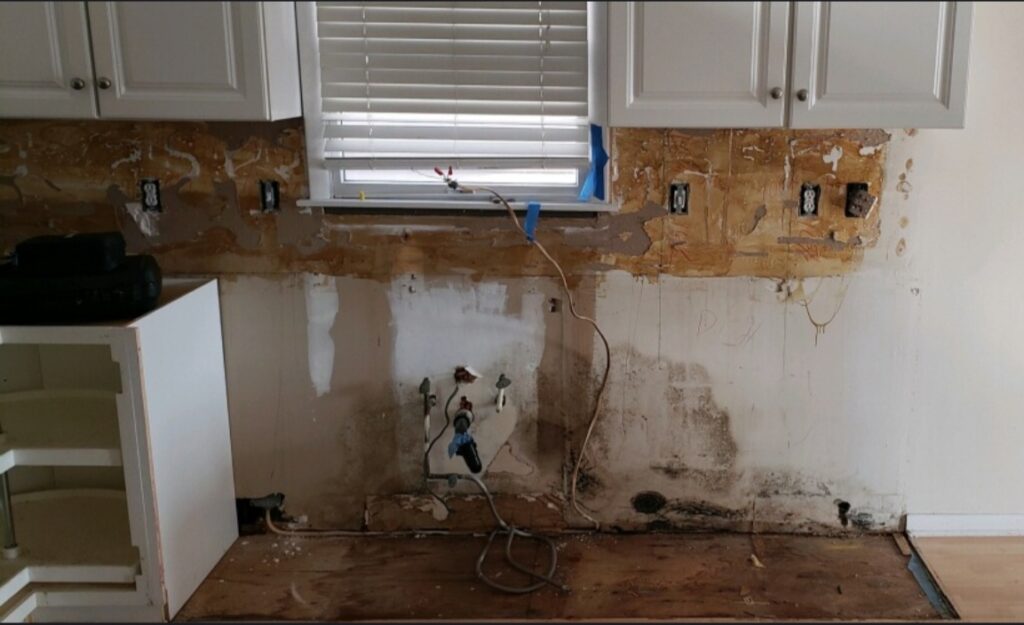
Unknown to my mother, she had a leaky pipe under the sink that caused a serious mold remediation need. The damage had already spread to several adjacent cabinets, and we ended up having to uninstall her entire set of lower kitchen cabinets and tear out the moldy wall surfaces behind them. Below is a picture of the damage.
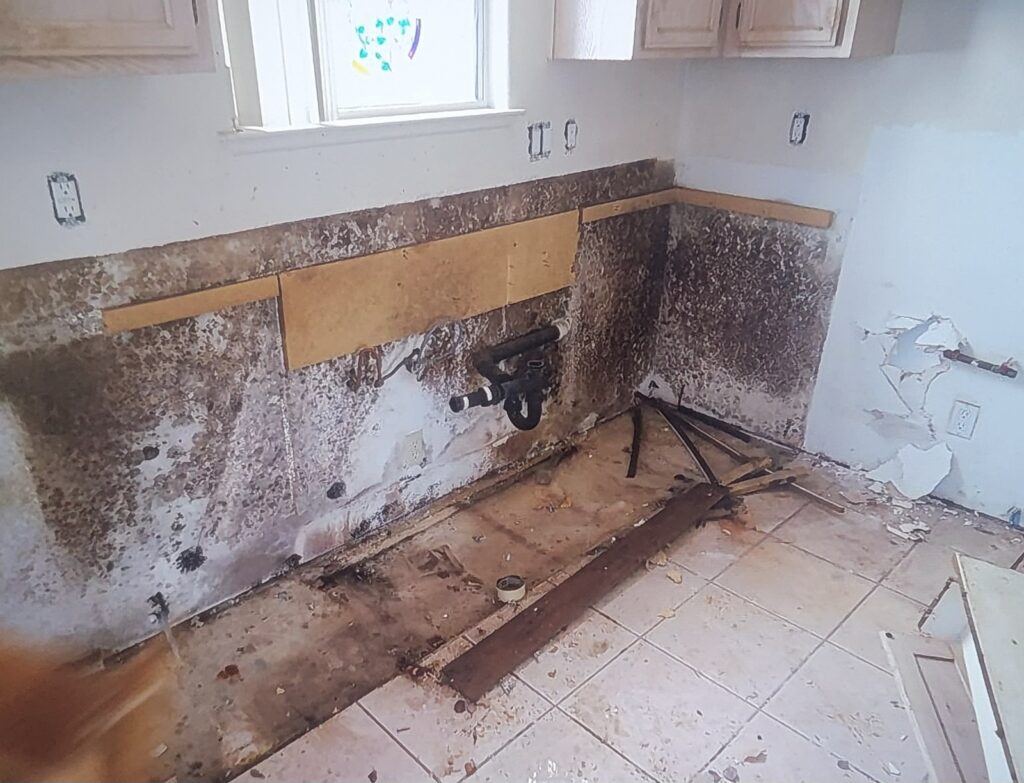
The contamination was actively growing on the kitchen cabinets as well as the wall and floor surfaces. Luckily the cabinets were salvageable and did not need to be replaced. This is not always the case. In fact, most of the time we need to remove and discard the cabinets which obviously becomes even more costly to replace.
How Mold Removal in your NJ Kitchen Cabinets Works?
The first thing we recommend is to inspect your kitchen cabinets on a regular basis. You should be looking for any hidden signs of water damage or leaks. These leaks will often occur from damaged water supply lines, dishwasher, and drain lines under your kitchen sink. By inspecting inside your cabinets, you will be able to find any early warning signs before they get out of hand. Look for dark spots, water damage, swollen or rotted wooden surfaces, warping or mold growing on the base plates, and of course any musty odors.
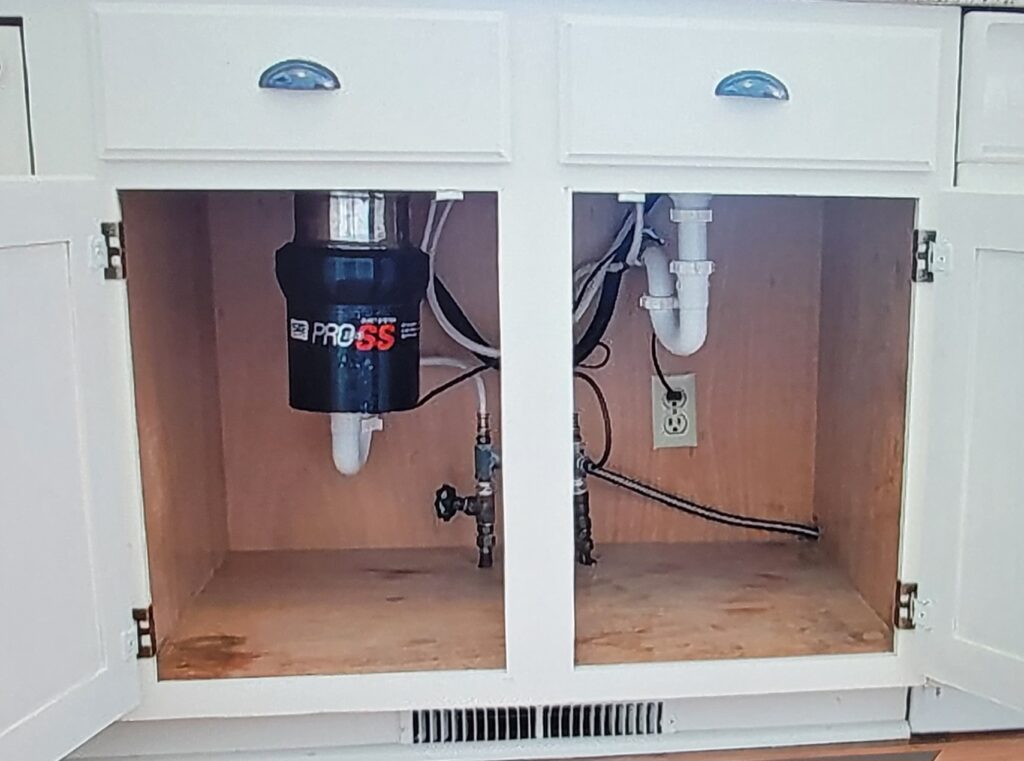
Another good practice is to allow your pots and pans to dry thoroughly before putting them away in your cabinets. These simple practices will help eliminate the probability of requiring kitchen mold removal in your NJ home. Otherwise you may need a certified mold inspection and mold testing company professional to help.
How Mold Remediation Companies Perform Mold Removal from Kitchen Cabinets in NJ
NOTE: If your kitchen cabinets are severely water damaged, have been affected by a heavy mold infestation, or the damage has been caused by a sewer backup, we will need to remove and dispose of them as they will not be salvageable.
First, we need to make sure we perform a thorough mold inspection and mold testing of your kitchen. Then once the mold testing results are back from the laboratory, we can proceed with your NJ kitchen mold removal project. Below is a typical description of what our companies procedures will likely be:
KITCHEN MOLD REMEDIATION SERVICES:
1. Set up a commercial air scrubber in the kitchen work area to remove airborne contamination and to prevent cross contamination.
2. Isolate the kitchen work area from the rest of the home with a set of plastic barriers to prevent cross contamination.
3. Manipulate all kitchen contents to help facilitate the work project.
4. Uninstall the kitchen countertop.
5. Disconnect and uninstall the kitchen appliances.
6. Uninstall all affected lower kitchen cabinets.
7. Remove and dispose of the newly exposed mold contaminated drywall, insulation, and flooring throughout the kitchen.
8. Dry down all newly exposed wall and floor surfaces with commercial air movers and dehumidifiers.
9. Perform a detailed HEPA vacuuming of all newly exposed kitchen wall and floor surfaces as well as the damaged kitchen cabinets (if salvageable).
10. Clean all newly exposed wall and floor surfaces as well as the damaged kitchen cabinets (if salvageable) with a general detergent.
11. Treat all newly exposed wall and floor surfaces as well as the damaged kitchen cabinets (if salvageable) with a sodium Hypochlorite based mold removing solution.
12. Heavily wet all newly exposed wall and floor surfaces as well as the damaged kitchen cabinets (if salvageable) with an EPA registered fungicide.
13. Supply and install new insulation and flooring where removed.
14. Supply and install new sheetrock. Tape, spackle, sand, prime and paint.
15. Re-install the kitchen cabinets (if Salvageable).
16. Re-Install all appliances.
17. Re-Install the countertop.
As you can see, when NJ kitchen mold removal is left untreated, it can be quite the costly and destructive proposition to deal with. When this unfortunate situation strikes, you can feel confident calling our company, Certified Mold Removal Inc. to perform professional mold inspection and mold testing services which will accurately diagnose your mold removal problems before performing the necessary mold remediation services in your home or office. We service New Jersey, Pennsylvania, New York, and Connecticut!
How to Remove Mold From Your Kitchen Sink and Drain
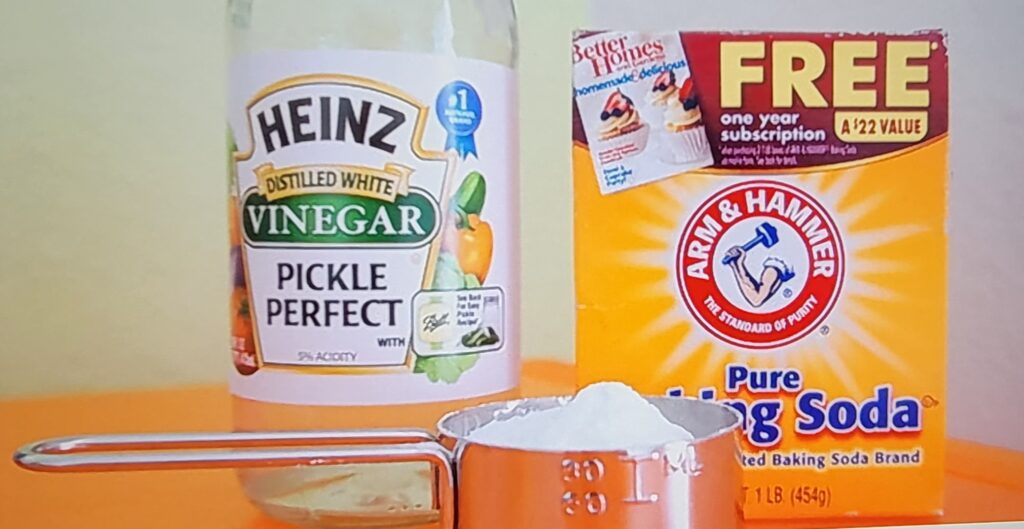
Mold loves to grow in dark damp spaces. As a result, your kitchen sink is the perfect breeding ground for it to form. Not only will it grow around your sink but in your garbage disposal system and in the pipe that connects your sink to your drain lines. One of the best and easiest ways to remove mold from your sink and the surrounding area is to use baking soda and distilled white vinegar. Simply pour ½ of a cup of baking soda down your drainpipe. Then after letting it sit for 10 minutes you can pour a cup of distilled white vinegar down your drainpipe. Then after a half hour you can flush it all down with hot water.
If you still have some stubborn mold growth after performing this procedure you can repeat the process and even use an old toothbrush to scrub any hard-to-reach areas. Then after you have scrubbed the areas, you can use a vinegar and water solution to sanitize the area before rinsing with warm water.
Another way to remove mold growth in your kitchen sink drain is to pour a cup of hydrogen peroxide down the drain. Once you do this it will start foaming up. This chemical reaction of the hydrogen peroxide with the mold growth will loosen the contamination making it easy to rinse with hot water after about 15-20 minutes.
How to Prevent Mold from Growing in Your Kitchen Sink and Drain
Cleaning your kitchen sink and drain on a regular basis is the easiest way to ensure mold growth will not form. Also be sure to never pour grease down the drain! Also be sure that you run your garbage disposal long enough to clear your drain lines. Regular inspection and removal of food buildup is imperative.
Removing & Preventing Mold in Your Coffee Maker
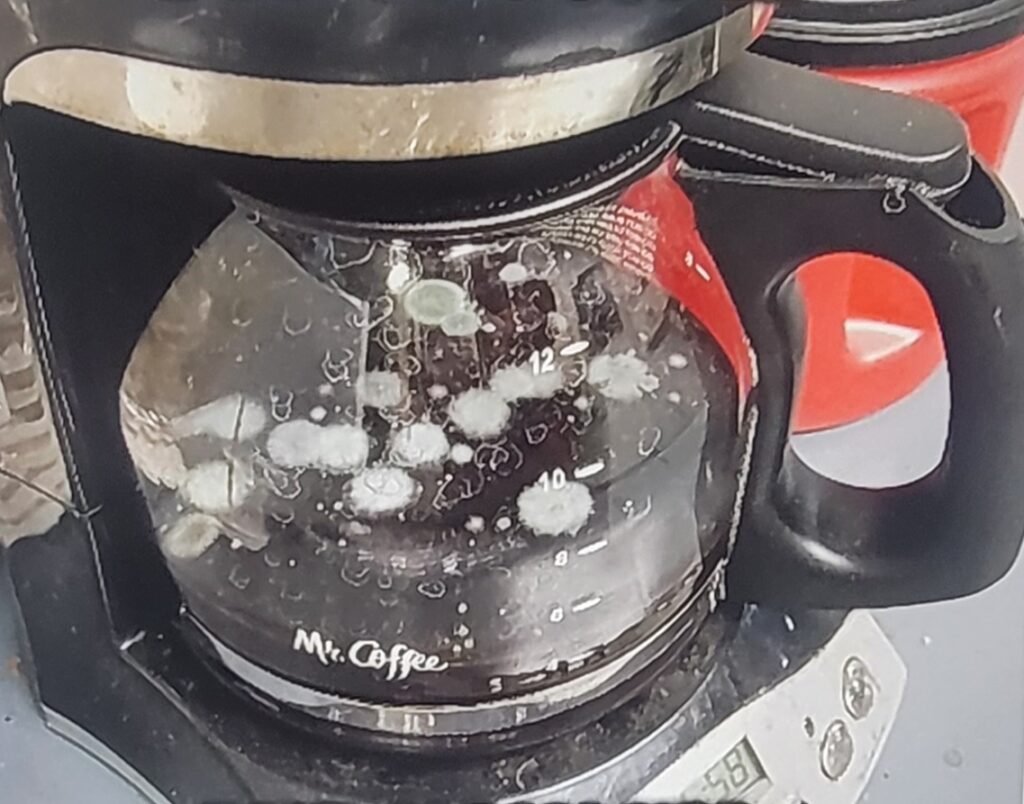
Most of us love to have a fresh cup of coffee in the morning. Unfortunately, the coffee grinds will leave your coffee maker dirty, and the residue combined with the water will quickly form mold contamination. This will disrupt the flavor of the coffee as well as cause it to be unhealthy to consume. Therefore, it is important to clean your coffee maker on a regular basis. This will prevent this buildup of unhealthy bacteria.
So How Often Should You Clean Your Coffee Maker?
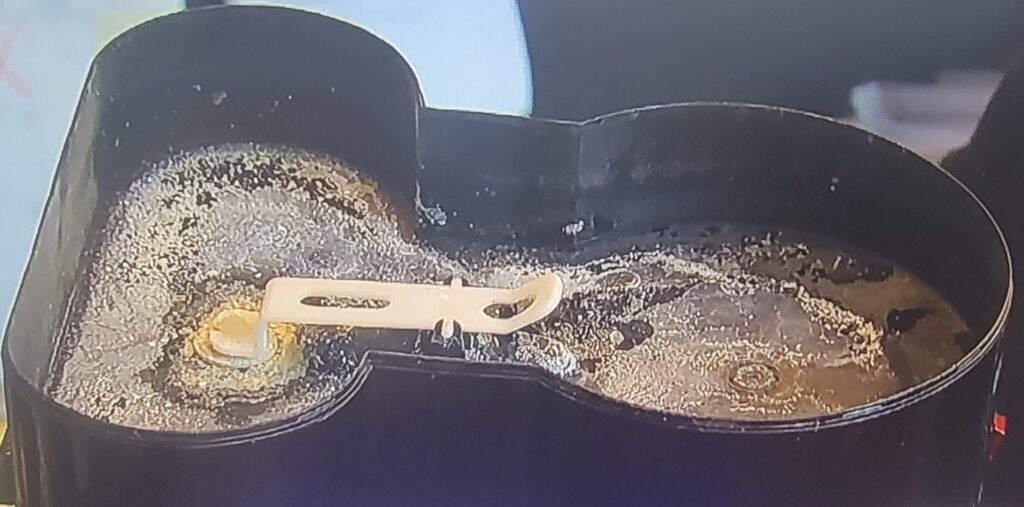
First you should look for visible signs of mold on any part of your coffee maker. Mold growth will occur in the water reservoir or in the overflow tray as well as the cup tray. Is there a funny smell coming from the machine? This is a shure fire sign that mold growth is lurking somewhere in the coffee maker where moisture is present. Areas such as the water reservoir or the drip pan. If your coffee maker has a slow drip system, this can easily cause a buildup. Also look for mold inside the funnel system. When this happens, your coffee grinds end up accumulating in the cup holder causing bitter tasting and unhealthy coffee to consume.
How To Clean Mold Contamination from Your Coffee Maker
When you see suspect mold growth in your coffee maker, you can follow the below cleaning steps:
- Unplug the coffee maker from the power source.
- Remove the drip tray. This is a section where your cup sits while the machine is brewing
- Open the lid and remove the cup holder and funnel – the funnel is under the lid where the cup is placed.
- Then place all of the dishwasher safe components in your dishwasher and run them through a cleaning cycle. Any components that are not dishwasher safe can be placed in a mixture of ½ cup white distilled vinegar and ½ gallons of warm water. Let them soak for 10-15 minutes.
- Then rinse these components in warm water. If you discover any hard to remove buildup, you can use a toothbrush to clean these areas.
- Always be sure to rinse all components under hot including the drip pan.
- Remove the water reservoir, then pour any water out.
- Then pour a combination of vinegar and water down the reservoir.
- Using a clean cloth, you then wash the sides and bottom of the container.
- Pour 4 cups of warm water in the reservoir. Put the lid on and then carefully shake for about 30 seconds. Then pour out the water and rinse.
- Then use a clean cloth to clean the water outlet port at the bottom of the reservoir. This will remove any contamination.
- Dry all parts of before re-assembling the coffee maker.
- Then fill your water reservoir with distilled water and run a few cycles through to ensure cleanliness.
How To Prevent Mold Growth in Your Coffee Maker
Here are some tips to help you prevent mold, bacteria, and other contamination from building up in your coffee maker. Always remove used coffee grinds from the machine as soon as you are done brewing. This prevents bacteria from forming inside. Remember, mold growth will start in as little as 24-48 hours. Be sure to inspect your drip tray on a regular basis especially after spills caused overflowing coffee. Leaving excessive amounts of water can quickly cause bacteria to grow. Change the water in the reservoir on a regular basis. Old stale water that is left in the tank for extended periods of time will create the perfect conditions for bacteria growth.
So, if you haven’t used your coffee maker in a few days and the water in the reservoir shows signs of mold growth you will definitely want to empty the water and clean the water reservoir thoroughly. Also be sure to clean the brewer tray frequently and remove any coffee grinds sitting inside.
How To Remove and Prevent Mold Growth Inside Your Kitchen Refrigerator
As you are probably aware, mold can and will grow inside of your refrigerator. These spores are resilient and will develop and grow in cold, dark environments. It can grow in your refrigerator on seals, gaskets, old, spoiled food, and on shelves and in draws. Why does this happen you may ask? Your refrigerator offers a great environment for many mold species to develop and flourish. Your refrigerator has little to no air circulation, plenty of moisture, and of course many food sources to choose from. Any old food in your refrigerator can cause an outbreak.
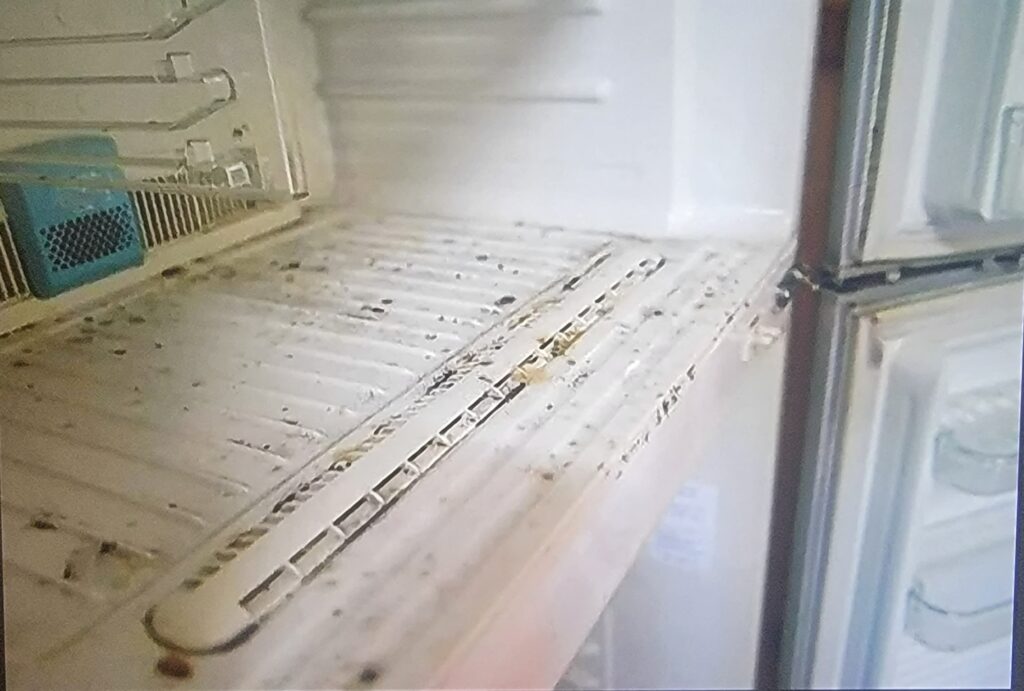
Please don’t panic when you see this happen. You can safely and effectively perform mold removal inside your refrigerator without the need to call in mold remediation companies. You can simply follow the steps outlined below:
- Remove and dispose of any old food that exhibits signs of contamination.
- After you have removed and disposed of all moldy foods you should empty your refrigerator of all other contents.
- Add a cup of white distilled vinegar and a gallon of warm water to a bucket.
- Place a clean cloth in the solution and begin cleaning all interior components of the refrigerator starting from the top to the bottom.
- It there is any stubborn visible mold, you can use a scouring pad to scrub the surfaces.
- Once done, pour out the cleaning solution and add clean warm water to the bucket.
- Then repeat cleaning all surfaces throughout your refrigerator.
- When done, use a dry microfiber cloth to wipe down all surfaces.
- To help prevent future mold growth and odors, place a box of baking soda in the refrigerator.
How to Prevent Mold Growth in Your Refrigerator
Below are some easy steps that will help you prevent mold from growing in your refrigerator.
First be sure to clean up spills in your refrigerator when they happen. Don’t let them sit. Also remember to clean your refrigerator on a regularly basis. Once a month is the recommended time interval. Finally, remember to throw away old food before it spoils causing bacteria to begin growing inside. By following these easy steps, you can avoid a messy mold cleanup inside of your refrigerator.
Mold Removal on Your Kitchen Ceiling
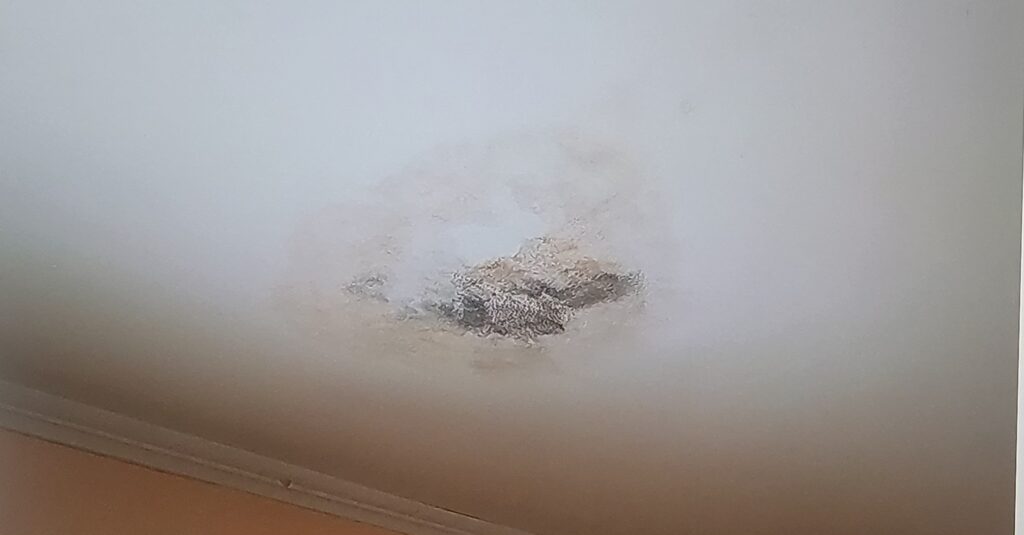
It is important to act fast when you see water staining or actual physical growth on your kitchen ceiling or any other ceiling area in your home. The first step is for a certified mold inspection professional to locate the source of the problem. It may be a roof leak, plumbing leak, a humidity issue, or any number of other reasons that is causing this mold removal issue.
Whatever the source of this problem is, it’s important that we quickly determine where this is coming from and get it repaired as soon as possible to stop the damage from spreading. After we have located and repaired the source of the damage, our companies experts will formulate a safe and effective mold removal plan that solves the problem in its entirety.
Below are the typical steps that companies like Certified Mold Removal Inc. will perform for safe and effective mold removal from ceiling areas affected by water damage.
1. Set up a commercial air scrubber in the kitchen work area to remove airborne contamination and to prevent cross contamination.
2. Isolate the kitchen work area from the rest of the home with a set of plastic barriers to prevent cross contamination.
3. Manipulate all contents to help facilitate the work project.
4. Remove and dispose of the contaminated ceiling surfaces.
5. Remove and dispose of all associated insulation.
6. Dry down all newly exposed ceiling surfaces with commercial air movers and dehumidifiers.
9. Perform a detailed HEPA vacuuming of all newly exposed ceiling surfaces.
10. Clean all newly exposed ceiling surfaces with a general detergent.
11. Treat all newly exposed ceiling surfaces with a sodium Hypochlorite based mold removing solution.
12. Heavily wet all newly exposed ceiling surfaces with an EPA registered fungicide.
13. Supply and install new insulation where removed.
14. Supply and install new sheetrock. Tape, spackle, sand, prime and paint.
When you call our company, Certified Mold Removal Inc. we will send a professional certified mold inspection and mold testing expert to your home before we jump into your mold removal and mold remediation project. This ensures that our companies professionals will save you money by performing your mold removal services right the first time! We service New Jersey, Pennsylvania, New York, and Connecticut!
How to Prevent Mold from Growing on Your Kitchen Ceiling
Preventing mold from growing on your kitchen ceiling is straightforward. The first thing you need to do is act quickly when you see a suspect issue on your kitchen ceiling. The main indicators that you have this problem is when you see active growth or water staining on the ceiling and when you sense a musty smell in that area of the home. When this happens you first must hire a professional certified mold inspection and testing company like Certified Mold Removal Inc.
We will come to your home right away to conduct a mold inspection and testing. This will enable us to find the source of your kitchen ceiling mold and give our companies experts the information we need to create a successful action plan that will eliminate both the source of your mold problem as well as the physical and airborne mold contamination. We service New Jersey, Pennsylvania, New York, and Connecticut!
Below are some tips on preventing kitchen ceiling mold from entering your home:
1. Locate and fix any plumbing problems, roof leaks, and water intrusion issues as soon as they are discovered.
2. Always turn on your kitchen exhaust fan when you are cooking.
3. Be sure that you’re A/C unit is properly maintained so it can remove excess humidity from the air in your home.
4. Keep the humidity levels below 50% inside your home at all times.
5. Any wet contents in your home should be quickly dried down within 24-48 hours to prevent mold growth on them.
Mold Prevention is Always a Better Alternative to Mold Remediation
As you can see, mold is not only a nuisance, but it can cause great damage to your home including an unhealthy living environment and very costly repair bills. Many people get very sick from breathing in air that is mold contaminated. Therefore, it is imperative that you act quickly when you discover a mold removal need in your home or office. Call Certified Mold Removal Inc., now and we can have a certified mold inspection and mold testing company specialist at your home today! We service New Jersey, Pennsylvania, New York, and Connecticut! https://www.certifiedmoldremoval.com/contact-us/
