A musty odor after a leak is not something to brush off and revisit next month. Mold problems get more expensive when moisture keeps feeding them, and a rushed look-around often misses the real source. The best mold inspection checklist helps you slow down, inspect the right areas, and make decisions based on evidence instead of panic.
For homeowners, property managers, and business owners, that matters because mold is rarely just a surface issue. Staining on drywall may be the visible symptom, while the actual problem is a roof leak, plumbing failure, condensation inside a wall cavity, or humidity trapped in an under-ventilated space. A proper inspection is meant to answer two questions first – where is the moisture coming from, and how far has the impact spread?
What the best mold inspection checklist should actually do
A useful checklist should not just tell you to look for black spots on walls. It should guide you through moisture history, building conditions, visible evidence, odor, ventilation, and materials that are more likely to support growth after water damage. It should also help you document what you find clearly enough that a certified inspector or remediator can act on it quickly.
That is where many generic checklists fall short. They focus on appearance and skip the conditions that allowed mold to grow in the first place. If the source is not corrected, cleanup becomes temporary and contamination often returns.
Start with the building history
Before you inspect any room, document what has happened in the property over the last 12 to 24 months. Water intrusions leave a trail, even when surfaces look dry now. Ask whether there have been roof leaks, burst pipes, appliance overflows, sewage backups, foundation seepage, HVAC condensation issues, fire sprinkler discharges, or periods of high indoor humidity.
Also note any repairs that were done. Fresh paint, patched drywall, replaced baseboards, or new flooring in one isolated area can point to prior water damage. That does not automatically mean there is an active mold problem, but it tells you where to look more carefully.
If occupants have noticed recurring odor, worsening allergy-like symptoms indoors, or staining that keeps returning, include that in your notes. Inspection works best when pattern and timing are part of the picture.
Best mold inspection checklist for high-risk areas
Some parts of a building deserve more attention because moisture is more common there. Bathrooms, basements, crawl spaces, attics, laundry rooms, mechanical rooms, utility closets, and areas around windows are typical starting points. Kitchens and under-sink cabinets also matter, especially in older properties where slow plumbing leaks can go unnoticed.
In commercial spaces, add janitor closets, break rooms, roof drain areas, tenant fit-out zones, and any section with past water intrusion. Multifamily properties need special attention around stacked bathrooms, shared plumbing walls, and HVAC systems serving multiple units.
When you inspect, look at ceilings, drywall, trim, flooring transitions, window sills, and the backs of stored items against exterior walls. Mold growth is not always out in the open. Warping, peeling paint, bubbling finishes, rusted fasteners, or soft building materials can be just as meaningful as visible colonies.
What to look for during the room-by-room inspection
Visible discoloration is one sign, but not the only one. Note staining, fuzzy growth, spotting, water rings, dampness, swollen materials, delamination, and persistent condensation. A room can have a contamination issue even if the growth is hidden behind drywall or above a ceiling tile.
Odor matters too. A strong earthy or musty smell often points to active moisture or concealed mold growth, especially when it is stronger near vents, cabinets, wall cavities, or lower-level spaces. Odor alone is not a diagnosis, but it is a valid reason to investigate further.
Humidity and airflow also belong on any serious checklist. Rooms with poor ventilation, chronically fogged windows, or cold surfaces that attract condensation are common problem areas. Bathrooms without effective exhaust, basements with damp air, and attics with poor venting create conditions mold can use even without a major leak.
Materials that deserve closer attention
Porous materials are more vulnerable after water exposure. Drywall, insulation, carpet, ceiling tiles, cardboard, wood framing, paper-backed products, and upholstered contents can all support growth if they stay wet long enough. Non-porous surfaces like tile or metal may show residue or surface growth, but the concern often lies behind or beneath them.
That is why a clean-looking bathroom wall is not always reassuring if the caulk has failed, the grout is cracked, and the wall on the opposite side shows staining. The checklist should push you to think beyond what is easiest to see.
Add moisture detection, not guesswork
The best mold inspection checklist includes moisture verification. If an area looks suspicious, moisture readings help determine whether the problem is active, recent, or historic. This is one of the biggest differences between a casual walkthrough and a professional inspection.
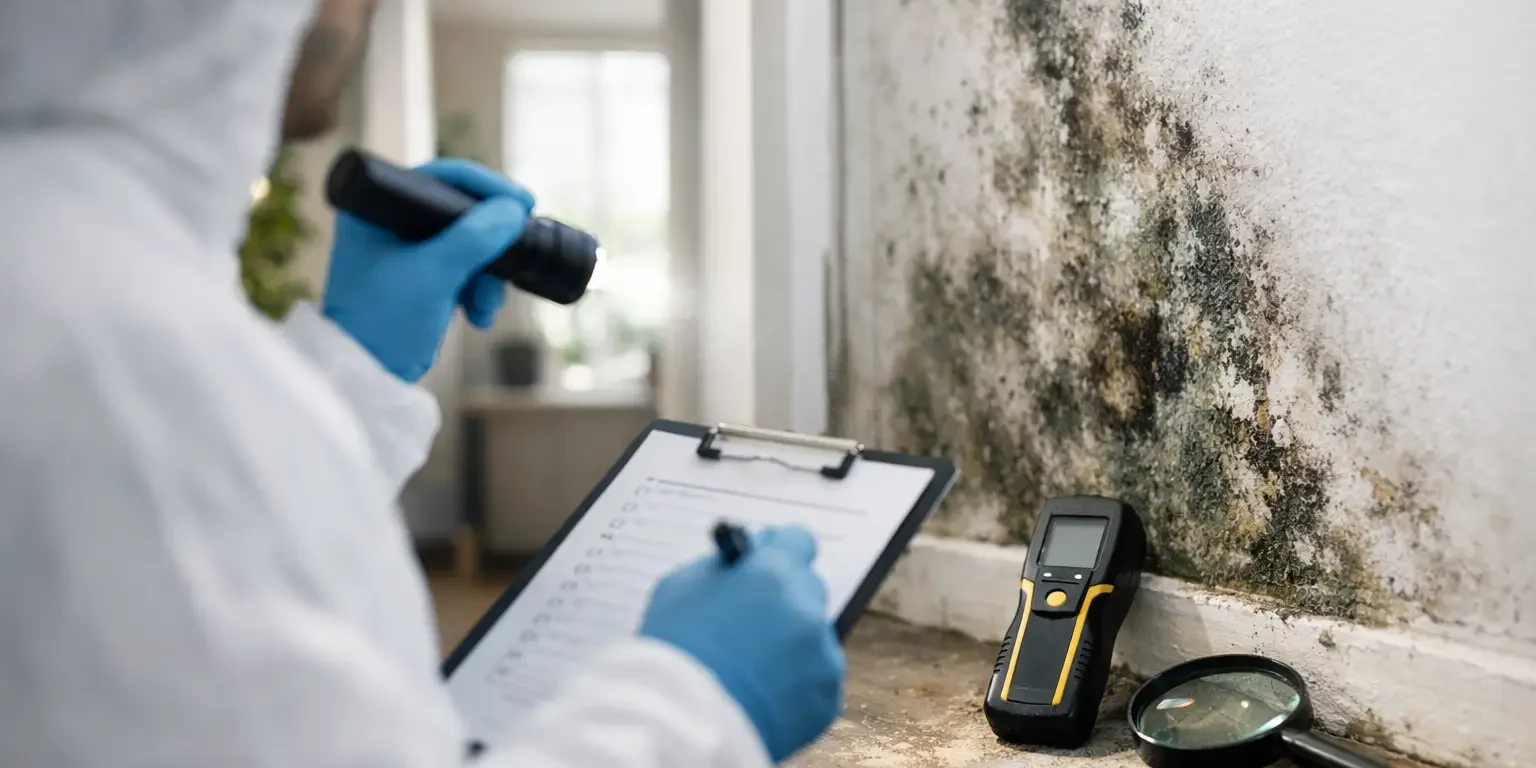
Infrared imaging, moisture meters, and humidity measurements can reveal hidden concerns that visual inspection alone may miss. That said, tools need to be interpreted correctly. An elevated reading does not always mean mold is present, and a dry surface does not rule out concealed contamination from an earlier event. It depends on the material, the building assembly, and what the rest of the evidence shows.
For that reason, inspection should connect moisture findings to building conditions. A wet baseboard near an exterior wall means something different from elevated moisture around an active plumbing line or around an HVAC air handler with poor drainage.
When sampling makes sense and when it may not
Not every inspection requires air or surface sampling. If there is obvious visible growth on water-damaged material, the priority is often to identify the source, define the extent of impact, and build a proper remediation plan. Sampling can be useful when growth is suspected but not visible, when there is an odor complaint without a clear source, when post-remediation verification is needed, or when documentation is important for tenants, transactions, or liability concerns.
This is also where fear-based sales tactics can mislead people. Not all mold is dangerous, and not every small isolated issue turns into a major project. But underreacting is also risky if moisture is ongoing or contamination is spreading through wall cavities, HVAC pathways, or multiple units. A qualified inspector helps sort out that difference.
Documentation should be part of the checklist
A mold inspection is only as useful as the record it creates. Include dates, room names, photographs, odor notes, moisture readings, occupant observations, and a diagram of affected areas. If damage appears linked to a leak, note whether the source has already been corrected or is still active.
This matters for more than convenience. Good documentation supports a remediation protocol, helps contractors avoid tearing into unaffected areas, and gives property owners a defensible record of what was found and how it was addressed. In larger homes, multifamily buildings, or commercial properties, that level of organization can save significant time and cost.
When to stop checking and call a certified specialist
A checklist is a decision tool, not a substitute for professional judgment. If you find widespread visible growth, recurring odor without a clear source, contamination after major water damage, suspected HVAC involvement, or moisture inside walls, ceilings, or crawl spaces, it is time to bring in a certified mold professional.
The same applies if occupants are medically sensitive, if the property is occupied by tenants or employees, or if you need a written remediation scope. Improper cleanup can spread spores, worsen indoor air quality, and turn a contained problem into a much larger one. That is why disciplined inspection and containment matter.
For buildings in places like Monmouth County and surrounding parts of New Jersey, where coastal humidity, storm damage, and basement moisture are common, speed matters too. The longer materials remain wet, the narrower your options become.
A practical mold inspection checklist to use now
Use this checklist as your baseline: confirm any history of leaks or humidity problems, inspect high-risk rooms, note visible staining or growth, identify odors, check ventilation, assess porous materials, document moisture conditions, and record everything with photos and location notes. Then ask the key question – has the source of moisture been identified and corrected?
If the answer is no, inspection is not finished.
Certified Mold Removal Inc. approaches mold this way because the safest, most cost-effective outcome starts with correct diagnosis. The goal is not to alarm you. It is to protect the building and the people inside it with a process that is accurate, fast, and grounded in standards.
If you are using the best mold inspection checklist and the evidence points to hidden moisture, recurring contamination, or a problem larger than surface cleaning can handle, trust what the building is telling you and act before the damage spreads.