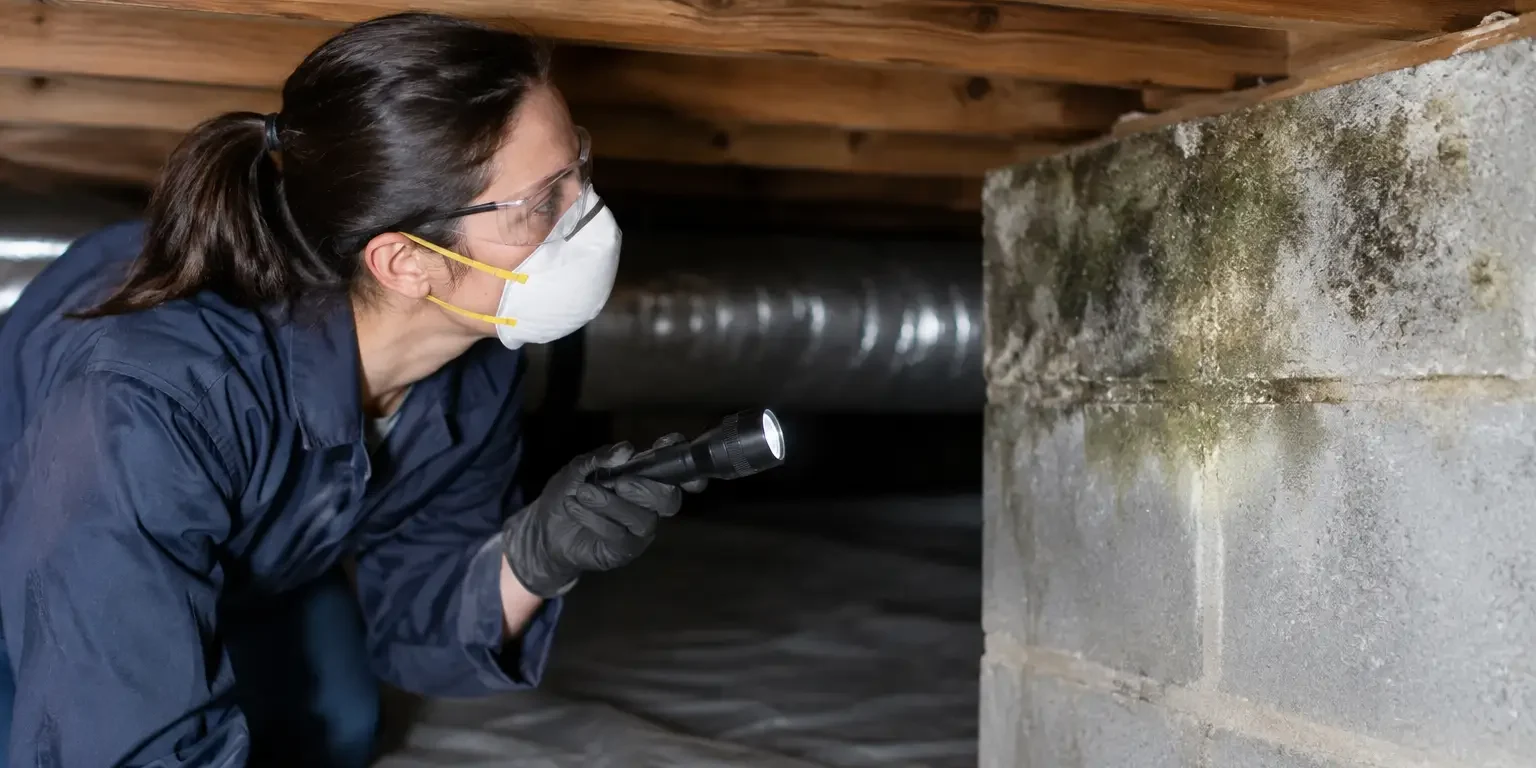
A crawlspace can look dry from the access door while moisture and mold growth are spreading farther inside. That is why learning how to inspect crawlspace mold starts with a careful visual assessment, not a quick look or an attempt to scrub away what you find. The purpose of an inspection is to identify conditions that support growth, determine whether contamination may be affecting the building, and decide when a certified professional should take over.
Not every dark mark is mold, and not all mold presents the same level of concern. Still, a damp crawlspace should not be ignored. Moisture below a home can damage framing, insulation, subflooring, and stored materials while contributing to musty odors and potentially affecting indoor air quality upstairs.
Start With Safety Before Entering the Crawlspace
A crawlspace inspection should be stopped before it starts if access is unsafe. Do not enter an area with standing water near electrical wiring, an unstable floor opening, damaged structural members, sewage backup, animals, or an unknown chemical odor. Tight spaces also create practical hazards: poor visibility, exposed nails, sharp debris, low clearance, and limited ways to exit.
For a basic visual check, wear clothing you can remove and wash immediately, closed-toe shoes or boots, gloves, eye protection, and a properly fitted respirator rated for particulate exposure. A disposable coverall can help keep dust and debris out of your living space. Bring a bright flashlight, but avoid disturbing suspect material with fans, brooms, or compressed air.
If anyone in the household has significant respiratory sensitivities, a weakened immune system, or severe allergies, keep them away from the access area and leave the inspection to a qualified mold professional. The goal is to gather useful information without spreading contamination or creating unnecessary exposure.
How to Inspect Crawlspace Mold Step by Step
Begin at the crawlspace entrance. Before going inside, look for water staining around the hatch, damaged weatherstripping, damp insulation, and a musty odor that becomes stronger when the door is opened. Odor alone does not prove mold, but it is a meaningful clue when paired with moisture or visible discoloration.
Once inside, move slowly and use your light to inspect the underside of the subfloor, floor joists, sill plates, support posts, insulation, foundation walls, vapor barrier, and any ductwork or plumbing lines. Start near the access point, then inspect the perimeter and areas beneath bathrooms, kitchens, laundry rooms, and exterior doors. These are common locations for plumbing leaks, drainage failures, and condensation.
Look for irregular patches or spotting in black, green, gray, brown, white, or orange tones. Mold can appear fuzzy, powdery, flat, or slimy depending on the surface and moisture level. It may grow in small isolated patches or cover broad sections of lumber and insulation. Water staining, warped wood, peeling insulation facing, rusted metal, and crumbling materials can indicate a long-term moisture problem even when visible growth is limited.
Do not assume black-colored material is automatically a specific type of mold. Visual appearance cannot reliably identify mold species or determine risk. Likewise, white material on masonry may be mineral deposits left behind as moisture evaporates rather than mold. A trained inspector evaluates the full condition of the space and may recommend targeted sampling when results will affect the remediation plan.
Check the Moisture Source, Not Just the Growth
Mold needs moisture to grow. Cleaning visible staining without correcting the water source often leads to repeat contamination, wasted money, and ongoing material damage. During your inspection, look for evidence of where the moisture is coming from.
Pay attention to plumbing pipes and fittings for drips, corrosion, or staining below joints. Check for condensation on cold-water lines, HVAC ducts, or uninsulated mechanical equipment. Examine the soil or vapor barrier for damp areas, puddles, or signs that water enters after rain. A torn, missing, or poorly sealed vapor barrier can allow ground moisture to rise into the crawlspace.
Outside conditions matter as well. Gutters that overflow, downspouts that discharge next to the foundation, poor grading, blocked drains, and foundation cracks can send water toward the crawlspace. In coastal and humid parts of New Jersey, seasonal humidity can also keep a crawlspace damp even without an obvious leak. The correct moisture-control approach depends on the cause. Ventilation may help in some situations, while other homes need drainage corrections, vapor control, dehumidification, insulation improvements, or plumbing repair.
Document What You Find Without Disturbing It
Good documentation helps determine the next step and gives a professional a clear starting point. Take well-lit photos from a safe distance, including wider shots that show the affected location and close-ups that show the material. Note which room is above the area, whether the surface feels damp, whether there is an odor, and whether you see evidence of an active leak.
Estimate the affected area rather than guessing at severity. A few spots on accessible framing after a minor, corrected leak may call for a different response than widespread growth on insulation, joists, and subflooring. Also document whether the material is porous. Insulation, cardboard, paper-backed materials, and some wood products can be more difficult to clean effectively than solid, nonporous surfaces.
Do not scrape, cut out, vacuum, or spray suspected mold during the inspection. Household bleach is not a complete crawlspace solution, especially on porous materials, and its use can create a false sense that the source has been addressed. If contamination is extensive or the source is unknown, disturbing it may spread spores and debris into adjacent areas.
When Professional Inspection and Testing Make Sense
A professional inspection is the prudent next step when growth is widespread, recurring, hidden behind insulation, connected to a significant water event, or accompanied by persistent odors indoors. It is also appropriate when you are preparing to sell or purchase a property, managing a rental property, or need documentation for a repair or remediation decision.
A credible mold inspection should not rely on fear or on a single visual observation. The inspector should assess moisture conditions, identify likely sources, evaluate the extent of affected materials, and explain whether sampling is useful. Testing can help answer specific questions, but it is not always necessary when visible mold and the moisture source are clear. The right decision depends on the property conditions and what information is needed to develop an appropriate scope of work.
For larger or complex conditions, ask for a written remediation protocol that addresses containment, removal methods, cleaning, moisture correction, and post-work verification. Certified Mold Removal Inc. approaches crawlspace conditions this way: diagnose first, correct the source, and use controlled remediation practices designed to protect the rest of the property.
Avoid These Common Crawlspace Inspection Mistakes
The most common mistake is treating a crawlspace as an isolated area. Air and moisture can move through gaps around plumbing, wiring, and flooring, so problems below the house can affect rooms above. Another is assuming a dry day means the crawlspace is dry. Many drainage issues appear only after heavy rain, snowmelt, or prolonged humidity.
Homeowners also sometimes focus on the color of a stain instead of its cause and extent. A small visible patch may be the edge of a much larger issue concealed by insulation or located near an active leak. Conversely, a dark mark may be old staining rather than active growth. That uncertainty is exactly where a methodical inspection provides value.
Finally, do not cover the problem with new insulation, plastic sheeting, flooring, or odor-masking products before the moisture source and affected materials have been evaluated. Covering contamination can make future diagnosis harder and allow damage to continue out of sight.
A crawlspace is one of the least visible parts of a building, but it supports everything above it. If your inspection reveals moisture, suspect mold, or deteriorating materials, preserve what you found, correct immediate water entry if it is safe to do so, and get a qualified assessment before the problem becomes more costly to contain.